
How to Highlight Text in Canva .easy but powerful method to make your important information stand out in any design. No matter if you are working on a presentation, a social media post, or a graphic design project, Canva offers simple tools that help you highlight text without any difficulty. In this step-by-step guide, we will explain how to highlight text in Canva so you can create attractive designs that deliver your message clearly and effectively.
How to Highlight Text in Canva
Highlighting text in Canva is very easy. You just select the text and click Effects → Background. Once you click “Background”, you can adjust the highlight to your liking. Alternatively, you can also highlight text using Canva Elements or the Drawing Tool.
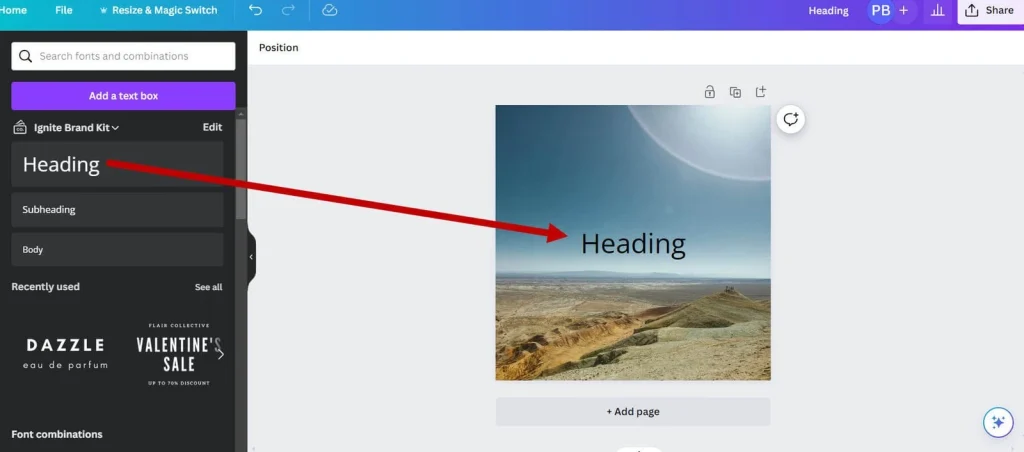
1. Add Text
First, open your Canva design file and click on the text you want to edit. If you want to add new text, click “Add a text box” from the left sidebar or the top menu and type in your desired content.
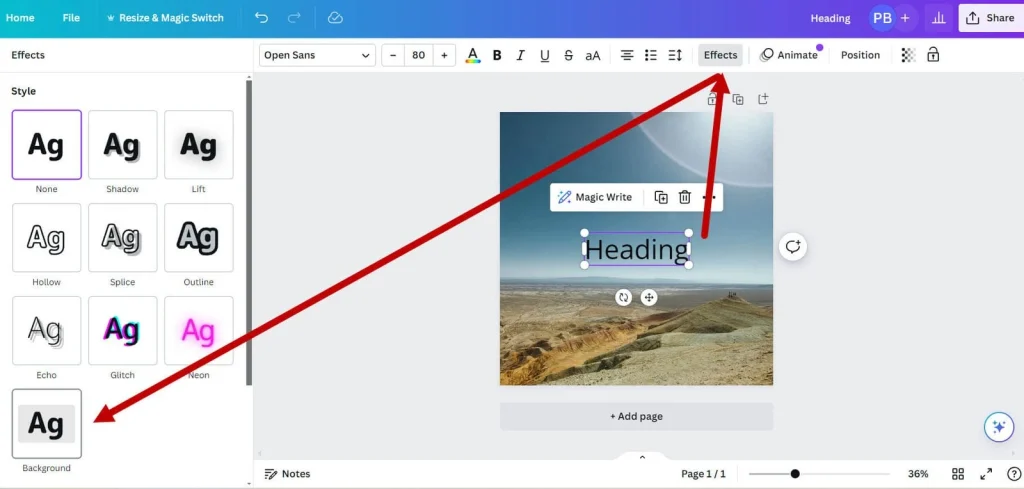
2. Apply Highlight Effects
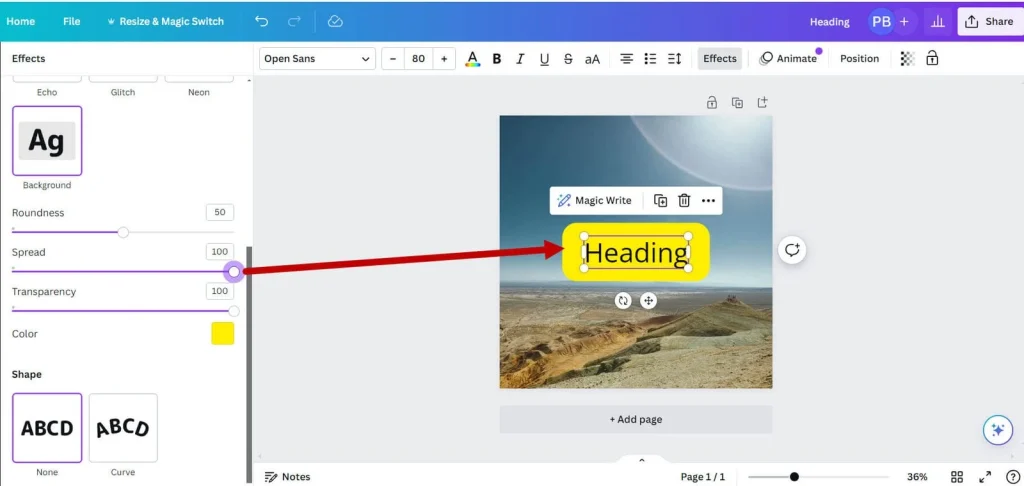
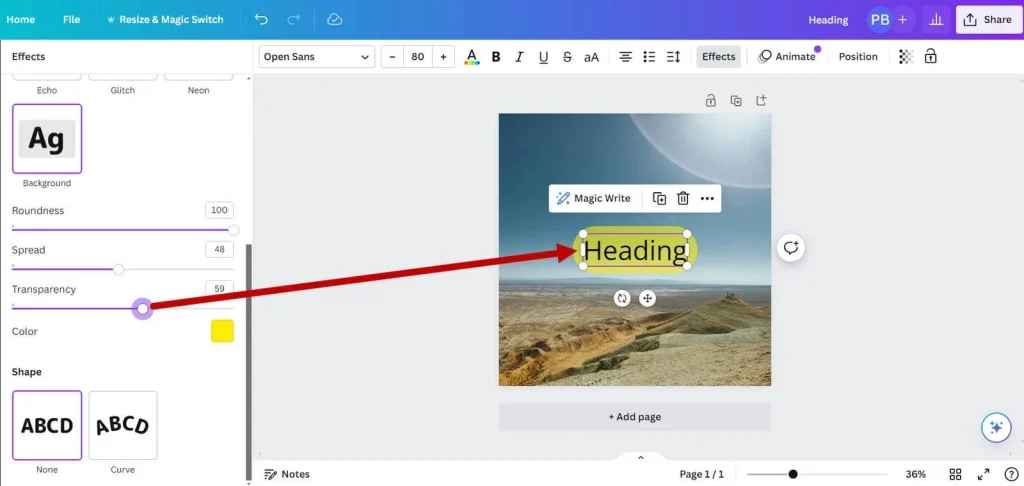
Now select the text box you want to highlight and then click on the “Effects” button. There will be different style options. Click on “Background” to make the highlight appear behind the selected text. This option is identified by an icon that shows a square with the letter
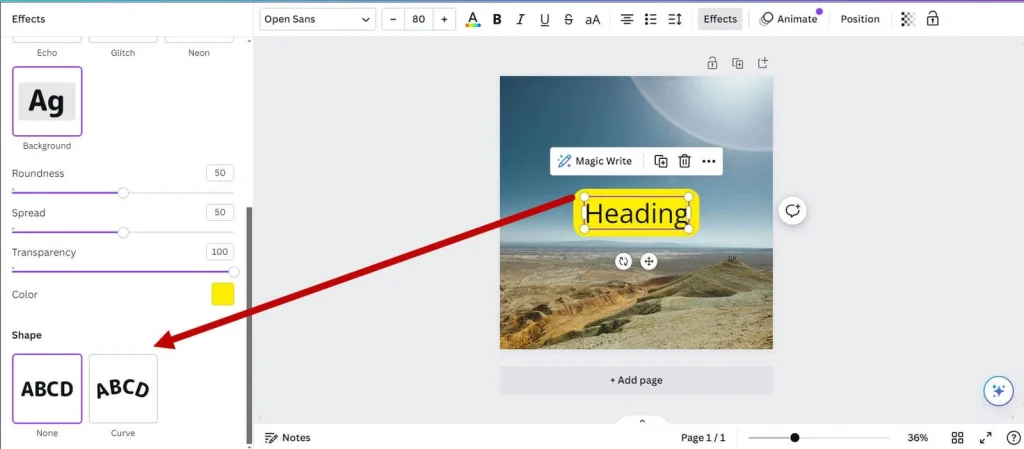
3. Customize the highlight
When you enable the Background effect, you will be presented with various customization sliders. With their help, you can change the color, size, and shape of the highlight as per your requirement.
Roundness
This slider changes the roundness of the corners of your highlighted text. The higher the value you set, the more rounded the corners will appear. By adjusting this slider, you can make the corners of your highlight softer or sharper.
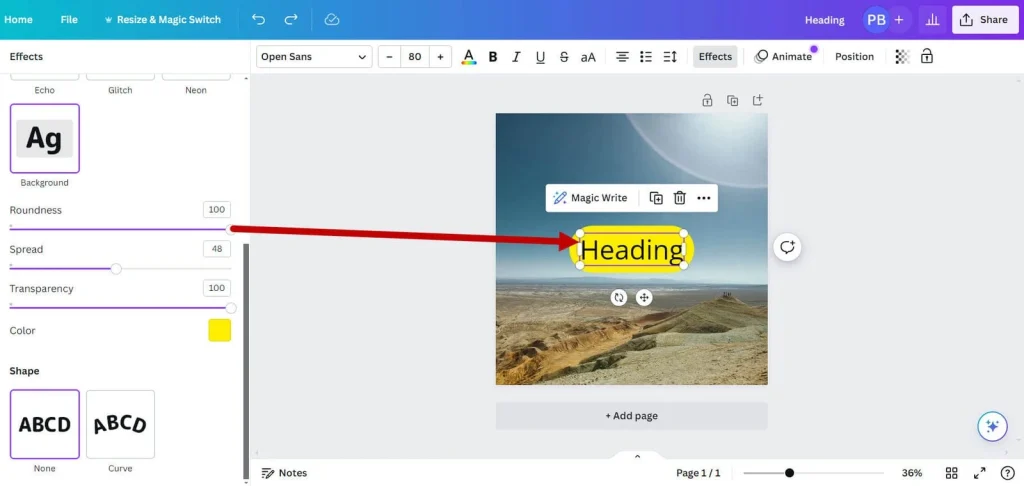
Padding
This slider controls the amount of space around the text within the highlight. If you increase the spread, the highlight will extend further beyond the edges of the text.
By adjusting this, you can control the highlight to extend more or less beyond the boundaries of the text.
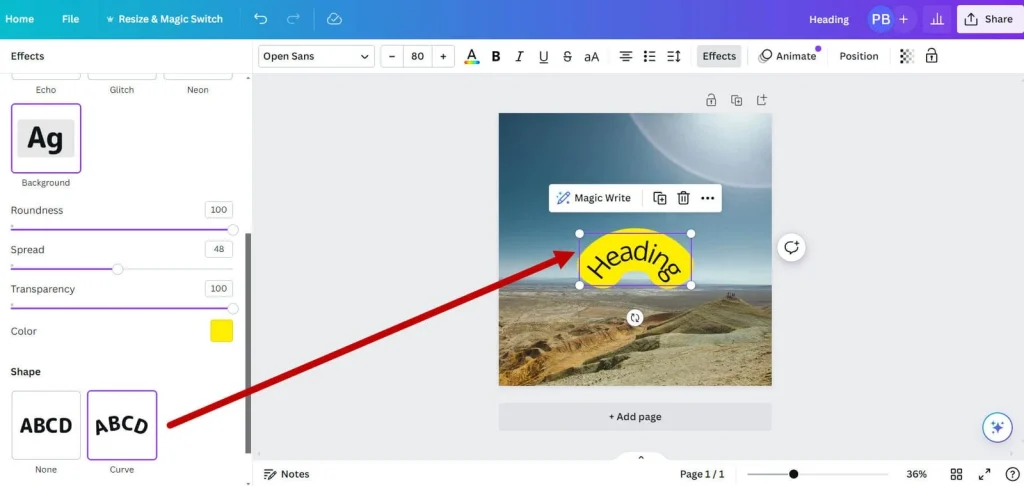
Pro Tip
Use the ‘Curve’ feature at the bottom of the Effects panel to create beautiful curves in your highlighted text. When you’ve adjusted all these settings, click anywhere outside the text box or press ‘Esc’ to deselect the text box and see your changes.
Color
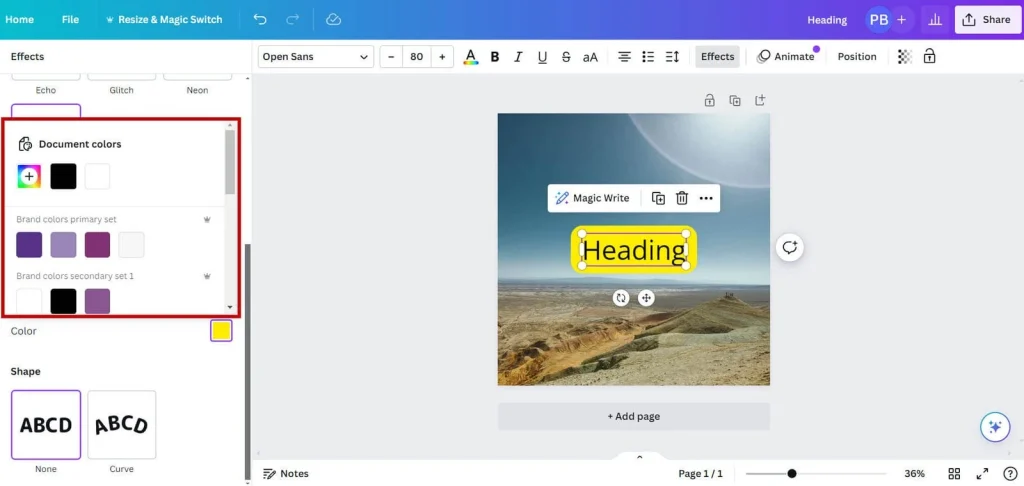
To change the highlight color, click the color square (which may show the last used color or yellow by default) to open the color picker.
Here you can select any color for the highlight. You can choose a color from the palette of colors available in the document or use your own custom color code.
Document colors are often available based on the template or brand kit you choose.
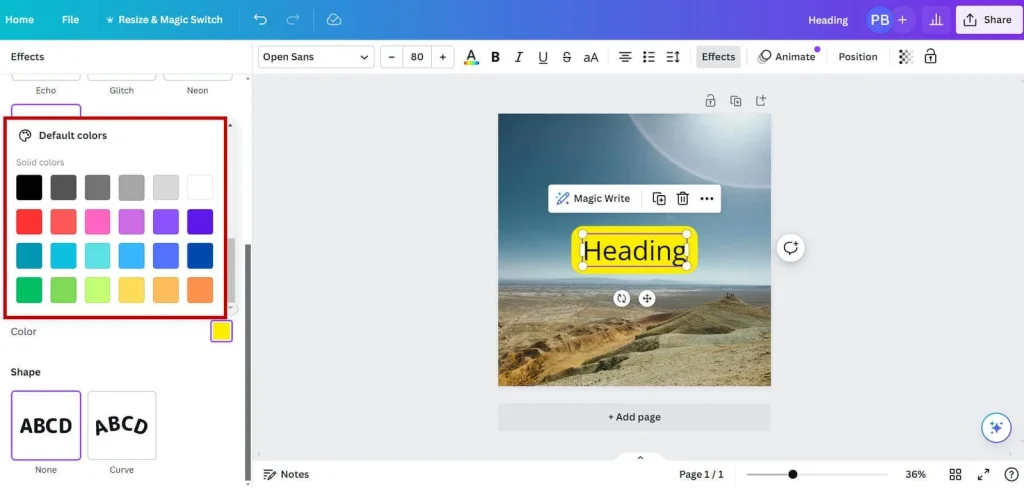
Colors offer a wide range that includes commonly used colors, so you can choose a color quickly and easily.
Transparency
This slider allows you to adjust the opacity of the highlight. Lower transparency means that the highlight will be more visible and the background design will be visible.
This allows you to control the see-through nature of the highlight color.
Adjust all the settings to your liking until you’re happy with the highlight. That’s it, your text is highlighted!
How to highlight text in Canva with Canva elements
Instead, you can also highlight text using Canva Elements.
1. Add Your Text
If you haven’t already, open your design file and add the text you want to highlight.
Click the “Text” button (T icon) in the left sidebar, choose a style or add a new text box, and type your text.
2. Select the Highlight Element
Canva doesn’t have a dedicated highlighter tool for text, but you can use elements like Shapes. Click “Elements” in the left sidebar and find a shape like Rectangle or Line.
3. Customize the Highlight Element
Click on the desired shape so that it is included in the design. Then resize and reposition it so that it fits behind the text. You can also change its color to your liking.
4. Send the shape to back
After placing the shape above the text, Send it to back so that the text is in front.
Right-click or use Position → Send to Back in the top toolbar.
5. Adjust transparency (optional)
If the highlight should be more visible and readable, adjust the transparency. Select the shape and use the Transparency slider in the top toolbar.
Finally, make any minor adjustments to the highlight’s location, color, font, or size, save the design, and download it in the format of your choice.
3. How to highlight a text in Canva with the Drawing tool
You can also use the Draw Tool to give a hand-drawn highlight effect.
1. Select the Drawing Tool
Click the Draw icon (the pencil shape) in Canva’s left sidebar. If it’s not immediately visible, look under More → the three dots.
Here you will see three types of brushes, select the Highlighter brush which looks like a real highlighter.
2. Select a color
After selecting the Draw Tool, a color palette will appear below. Select a color for the highlight. You can use document colors, brand colors, or a new color.
3. Adjust Drawing Settings
Before starting the highlight, adjust the line thickness with Weight and the transparency with Transparency.
4. Highlight text
Click on the canvas where you want to start the highlight and drag over the text with the cursor. Keep the line as straight as possible. Use the Undo button if necessary.
5. Fine-tune the highlight
If necessary, use the Eraser Tool to erase excess areas or readjust the color and transparency.
How to highlight text in Canva Conclusion
Highlighting text in Canva is an easy and effective way to make important information stand out in your design. You can make your highlighted text unique and attractive by using different colors, fonts, and styles. Official Website >: www.canva.com
Read This >>> How to Change Background in Canva: Pro Tips