
Hanging Indent in Canva creating text indents in Canva is slightly different from what you might be used to in traditional word processors like Microsoft Word or Google Docs.
While Canva doesn’t include a one-click feature for a hanging indent in Canva, you can easily achieve the same effect with a few manual adjustments.
This complete guide explains how to do a hanging indent in Canva and Canva Docs with practical steps that improve the look and readability of your design projects.
If you haven’t tried Canva Pro yet, consider starting with a free trial to explore advanced tools that make creating a hanging indent in Canva Docs even easier.
Understanding Indentation Types
Before getting into the process of creating a hanging indent in Canva, it’s important to understand what indentation means and the different styles available.
Each indent type serves a unique purpose in design and document formatting:
- First-line indent: Only the first line of a paragraph is indented.
- Hanging indent: The first line stays to the left, while the rest of the paragraph moves to the right.
- Block indent: The entire paragraph shifts in from the left margin.
A hanging indent in Canva is especially useful for bibliographies, reference lists, and design layouts that require neat text alignment.
How to Indent in Canva
To create indents in Canva, you’ll need to manually adjust your text boxes or use spaces.
For a first-line indent, simply add spaces before the first line.
For a block indent, move the entire text box slightly to the right.
In Canva Docs, you can use the Increase Indent or Decrease Indent options, but they are limited to basic first-line and block indents.
To create a hanging indent in Canva Docs, however, you’ll need to follow a manual method similar to the one described below.
How to Do a Hanging Indent in Canva
Currently, Canva does not provide a built-in tool for hanging indents, but you can create one manually.
Follow these steps carefully to design a clean and consistent hanging indent in Canva:
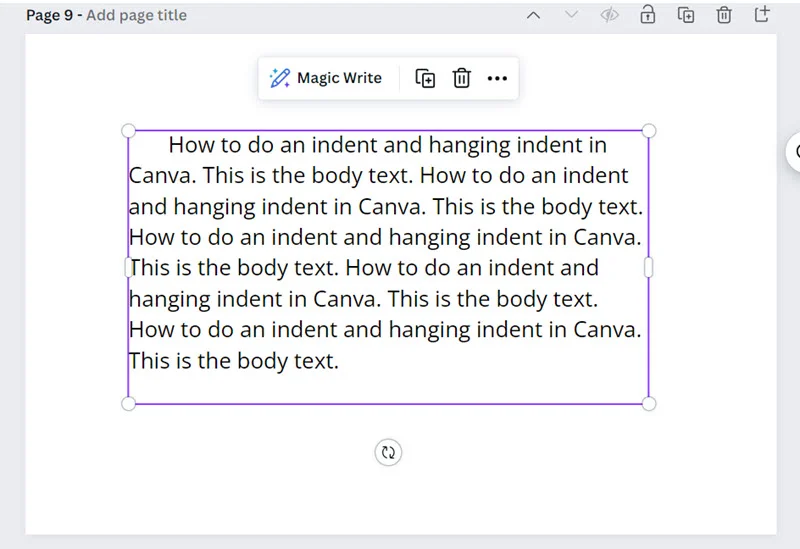
- Cut the first line from your text box.
- Paste it separately onto your design canvas.
- Match its formatting with the rest of your text.
- Move this first line slightly to the left of the main paragraph block.
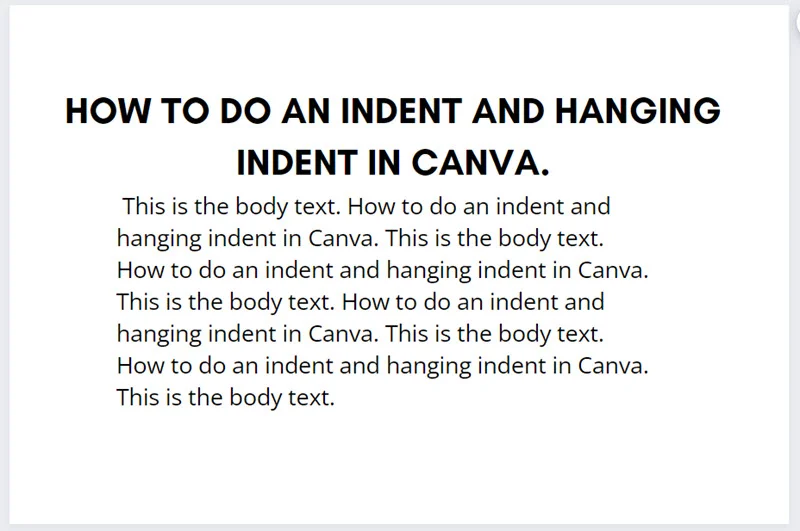
That’s all — you’ve successfully created a hanging indent in Canva using a manual method that looks professional and aligns perfectly with design standards.
Expert Tip:
For precise alignment when making a hanging indent in Canva Docs or designs, use Canva’s snapping and grid tools. They ensure cleaner, consistent formatting across your document or graphic layout.
For a full step-by-step demonstration, watch the tutorial video showing exactly how to do a hanging indent in Canva and Canva Docs.
Pro Tip
While Canva Docs includes some indenting features, they aren’t available across all Canva design types.
That means the way you create a hanging indent in Canva for a document may differ slightly from how you do it in a design project like a presentation or Instagram post.
Indenting in Canva Designs (not Docs)
Canva designs include projects like Instagram stories, presentations, posters, and other creative layouts.
Although Canva lacks a dedicated indent button, you can easily create a hanging indent in Canva by adjusting your text manually.
1. First-line Indent
Add a few spaces before the first line of your text until you reach your desired indentation position.
2. Block Indents
Since Canva doesn’t have a ruler or tab feature like Word, adjust the text box manually to shift your paragraph.
You can move it slightly left or right depending on your layout requirements.
3. Hanging Indent in Canva
Follow these steps for an accurate hanging indent in Canva:
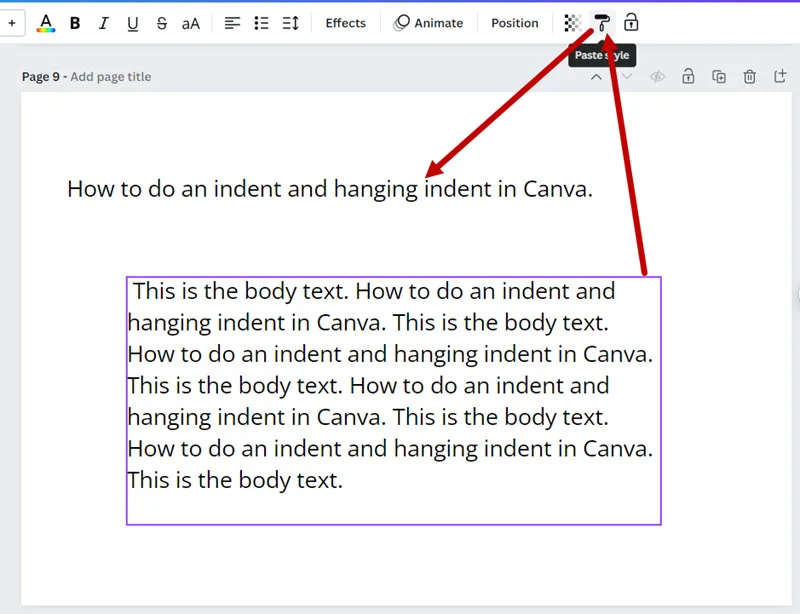
- Select and cut the first line of your text box.
- Paste it back as a new text element.
- Apply identical formatting to keep a consistent look.
- Align the new line slightly to the left of your main text block.
And that’s how to create a clean, professional hanging indent in Canva manually!
Indent Limitations and Workarounds
While Canva gives you creative flexibility, there are some limitations when it comes to hanging indents and paragraph formatting.
- Limited Indent Control
Canva Docs only allows a single first-line indent. Repeatedly clicking “Increase Indent” moves the entire text block instead of just the first line.
This affects how you manage spacing when making a hanging indent in Canva Docs. - No Built-in Hanging Indent Feature
The “Increase Indent” option can’t move only the first line to the left — it moves the entire paragraph rightward.
Therefore, to create a hanging indent in Canva, you must rely on manual spacing or text box adjustments. - Manual Customization Option
You can always ignore the indent icons and manually format text.
Place your cursor at the beginning of the line and insert spaces to create the desired hanging indent effect in Canva.
Conclusion
Although Canva isn’t primarily designed for detailed text formatting, it still provides enough flexibility to create professional-looking layouts with proper spacing and alignment.
By following the steps above, you can effectively create a hanging indent in Canva or Canva Docs for any type of design or document.
Remember — Canva’s main strength lies in its visual creativity. While it’s not a replacement for Microsoft Word or Google Docs, it allows users to combine beautiful text layouts with eye-catching graphics quickly and affordably.
Mastering the process of how to do a hanging indent in Canva will help you produce cleaner, more organized designs that meet both SEO and design quality standards — increasing the credibility and professionalism of your content.