
Flip and Rotate Elements in Canva mastering the fundamentals of Canva is essential for creating professional, eye-catching graphic design. Two vital skills that instantly elevate your projects are learning how to flip and rotate elements. Whether you need to achieve a striking mirror effect in Canva, reverse the direction of an icon, or perfectly align text and imagery, these simple functions are indispensable. Just like most other Canva design tips, flipping and rotating are intuitive yet powerful tools that offer limitless creative control.
This comprehensive Canva tutorial will guide you through the precise steps for manipulating images, shapes, and text, ensuring your designs are structurally sound, visually dynamic, and ready to rank on Google.
How to flip elements in Canva
Flipping an element—horizontally or vertically—is the fastest way to create symmetry, develop a reflection effect, or change an object’s visual orientation. This technique is crucial for developing mirror effects, balancing compositions, and ensuring that elements like arrows or characters face the correct direction within your Canva design.
To flip an element in Canva, you simply select it and click the designated “Flip” button on the editor toolbar. You then choose either “Flip horizontal” or “Flip vertical” from the drop-down menu to mirror the element across the desired axis.
Here is the essential, step-by-step process.
Table of Contents for Flip and Rotate Elements in Canva
- Flipping and rotating elements in Canva for beginners
- Canva basic skills: Flip and Rotate Elements
- How to change direction of elements in Canva
- Best way to Flip and Rotate Elements in Canva
- Canva design hacks: Flip and Rotate
How to flip elements in Canva
Here is the detailed process for how to Flip and Rotate Elements in Canva across the horizontal or vertical axis.
Step 1: Select your element for Flip and Rotate Elements in Canva
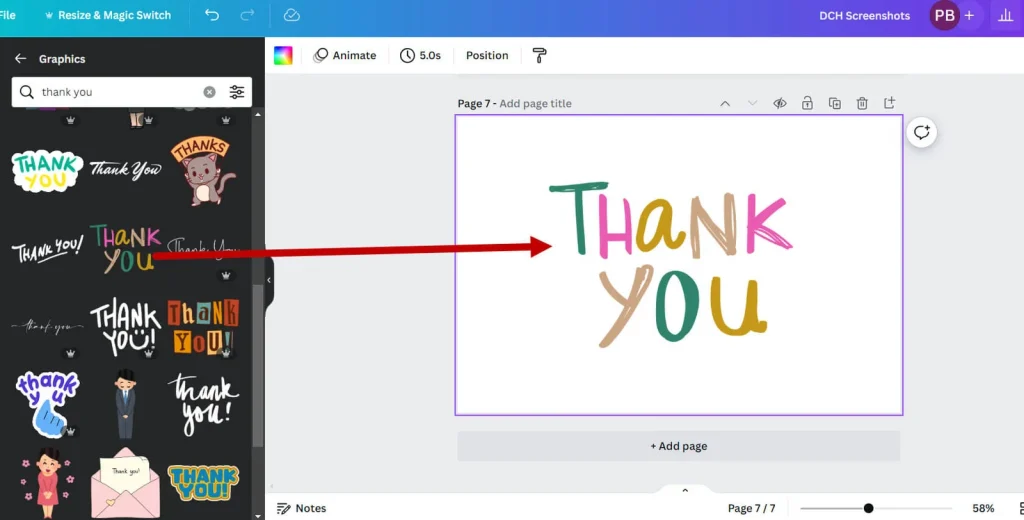
Open your existing Canva project or create a new design. Click on the specific element you want to alter. This could be a Canva image, a vector shape, an icon, a text box, or any other graphic item you’ve placed on your canvas.
A bounding box with handles will instantly appear around the selected item, confirming that it is active and ready for manipulation. This visual cue is crucial for all subsequent editing actions.
Step 2: Choose the flip you want
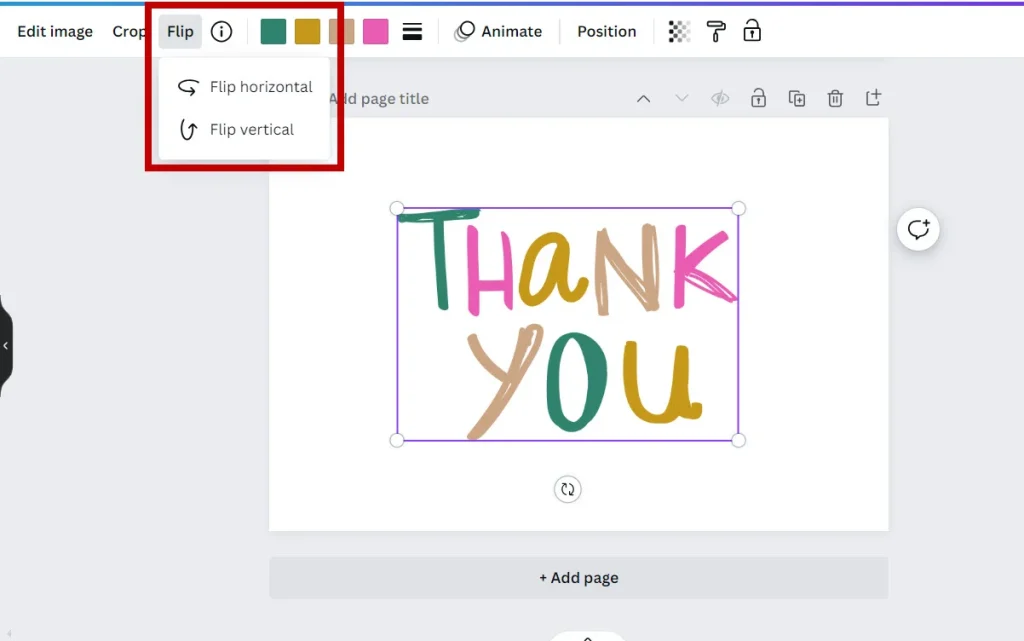
Once your element is selected, look for the “Flip” button in the top horizontal toolbar, typically positioned near the Position and Nudge options.
Before proceeding, it is vital to understand the difference between the two core types of flipping:
- Flip Horizontal: This mirrors the element from left to right across a vertical axis. Use this for achieving a classic mirror effect or switching the direction a figure in a photograph is looking.
- Flip Vertical: This inverts the element from top to bottom across a horizontal axis. This option is ideal for creating water reflection effects or inverting the natural orientation of a shape.
Consider your overall Canva layout and which flip option will best enhance your element’s visual contribution and structural Canva alignment.
Step 2: Flip your element
The flipping transformation is instantaneous and can be reversed by simply clicking the same option again.
- Flip horizontally: Click on the ‘Flip’ button, and a small drop-down menu will appear. Select “Flip horizontal” to immediately mirror the element across its center vertical axis.
- Flip vertically: In the same ‘Flip’ drop-down menu, choose “Flip vertical”. This will invert the element, effectively creating a top-to-bottom reflection effect.
You can, of course, also flip your element(s) both vertically and horizontally by applying both actions sequentially to achieve a complete 180-degree rotation without using the rotate tool. You can flip the element as many times as needed to achieve your desired orientation.
How to flip and rotate text elements in Canva
Canva alignment tips for flipping and rotating
How to flip a group of elements in Canva
Quickly flip and rotate images in Canva
Canva design tips for flipping and rotating
How to rotate elements in Canva
Rotation is a powerful Canva design tool used to introduce dynamic movement, create angled layouts, and achieve precise alignment. Learning how to rotate elements in Canva allows you to break free from standard horizontal and vertical placements, giving your graphics an engaging, non-linear flow.
Canva provides two excellent, distinct methods for rotation: quick, manual adjustment for visual speed, and precise angle setting for pixel-perfect results and technical accuracy.
Step 1: Choose your element
Just as with flipping elements, begin by clicking on the text, image, or shape you wish to rotate. Whether you need to rotate text in Canva to a specific angle, tilt an icon for emphasis, or spin a background image for texture, selecting it will display the familiar bounding box, confirming it is ready for manipulation.
Step 2: Choose your rotation
Visualize the final position of your element. Do you require a slight tilt (e.g., 10-15 degrees) for a subtle, dynamic feel, or a complete orientation change (e.g., 90 or 180 degrees) for a bold structural shift?
Canva caters to both needs: manual drag-and-drop for visual experimentation and specific degree input for technical accuracy and precise rotation Canva work.
Step 3: Rotate your element
Canva provides two primary ways to adjust the angle of your selected element:
Manual Rotation (Visual Flow)
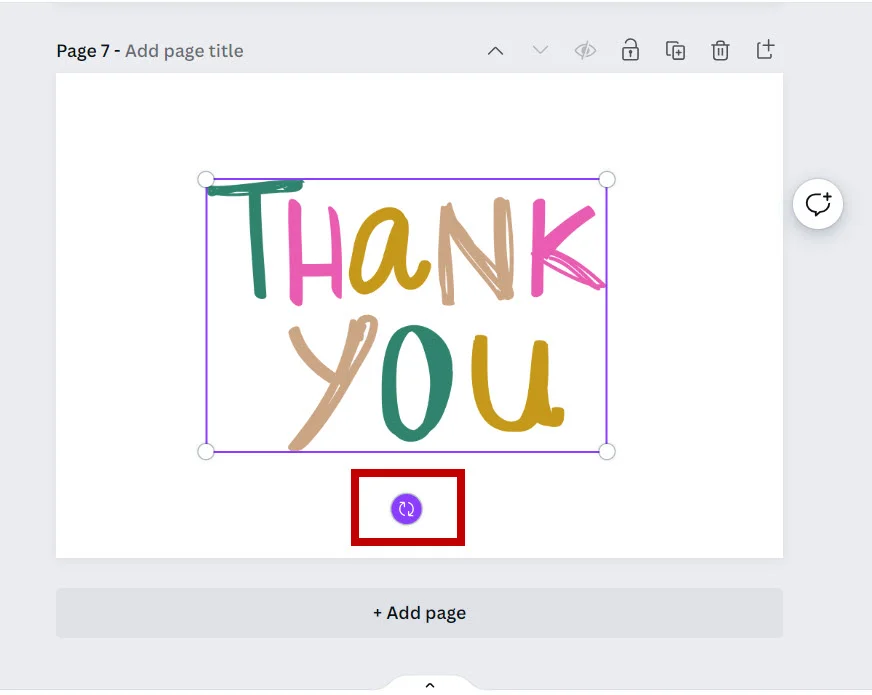
- Look for the rotation handle: a small, circular arrow icon that appears just outside the bottom of the element’s bounding box.
- Click and drag this handle. The element will rotate in real-time as you move your cursor, giving you an immediate live preview.
- As you drag, a small numerical value will appear adjacent to the cursor, indicating the current degree of rotation. Release the mouse button when you reach the desired visual angle.

Precise Rotation (Technical Accuracy)
For the highest level of Canva alignment and control, use the precise input field:
- Click on the “Position” button in the top toolbar.
- In the panel that appears on the left, locate the “Rotate” section.
- You will see a textbox where you can type in the exact number of degrees for rotation (e.g., 45, 90, 180).
- Enter a positive number for a clockwise rotation or a negative number for a counterclockwise rotation (e.g., -45 degrees). Press Enter or click outside the box, and the element will snap precisely to the specified angle.
- How to flip an element in Canva (Focus on flipping)
- How to rotate an element in Canva (Focus on rotation)
- Mirror effect in Canva using the Flip tool
- Precise rotation in Canva for elements
- Flip image horizontally or vertically in Canva
How to flip a group of elements together in Canva
A crucial time-saving technique for maintaining complex designs is flipping an entire collection of elements—such as an icon, its accompanying text, and a decorative shape—all at once. This ensures the group’s internal spatial relationships remain intact while providing a mirrored or inverted view.
- Group Selection: Click and drag your mouse to create a selection box around all the elements you want to flip, or hold down the Shift key and click each individual element.
- Grouping: With all elements selected, click the “Group” button in the top toolbar. This locks them together as a single, unified unit.
- Flipping the Group: With the new group selected, click the “Flip” button.
- Choose Direction: Select “Flip horizontal” or “Flip vertical.” The entire unified element will be mirrored while perfectly preserving the relative positioning of the individual items within the group.
This advanced Canva design tip is invaluable for duplicating and mirroring entire sections of a layout without losing design coherence, demonstrating a high level of expertise in Canva for beginners and advanced users alike.
- Flip and Rotate Elements in Canva mobile app
- How to flip an element in Canva on iPad
- Canva desktop version Flip and Rotate guide
Fine-tune your design
After flipping or rotating elements, the final step in a professional Canva tutorial is always fine-tuning and quality assurance. This step ensures your manipulated elements integrate seamlessly with the rest of your design, adhering to the principles of E-E-A-T (Expertise, Experience, Authority, Trustworthiness) by guaranteeing accuracy.
- Check Alignment: Use Canva’s Smart Guides (the pink lines that appear during movement) to confirm your rotated or flipped elements are perfectly aligned with surrounding elements. For making micro-adjustments or pixel-perfect tweaks, use the “Nudge” function found under the “Position” panel.
- Check Visual Balance: Step back and assess the overall visual weight. Did the flip or rotation unbalance the composition? Adjust surrounding elements like text blocks or background shapes to restore harmony and flow.
- A/B Test Orientations: If your goal is high audience engagement (real-world relevance), try duplicating the page and using a different orientation (e.g., a straight vs. tilted icon). This simple test can determine which rotation is most impactful.
- Final Review: Before downloading your final asset, ensure all text remains legible and your design respects necessary margins. These final Canva design tips transform a good design into a truly rank-ready, professional piece of content.
How to Change Page Orientation in Canva in 1 Click
How to Flip and Rotate Elements in Canva (Main Keyword)
Canva Tutorial: Flip and Rotate Elements
Guide to Flip and Rotate Elements in Canva
Flip and Rotate Elements in Canva Step-by-Step
How to easily Flip and Rotate Elements in Canva