
How to do Canva mail merge
Canva mail merge, use the Bulk Creation app to upload a CSV file containing your data. Your data fields will be inserted into Canva. Connect the data fields to the appropriate elements in yourHow To Do Canva Mail Mergee. Click ‘Generate Design’ to create custom documents for each entry.
Step 1: Organize Your Date Canva Mail Merge
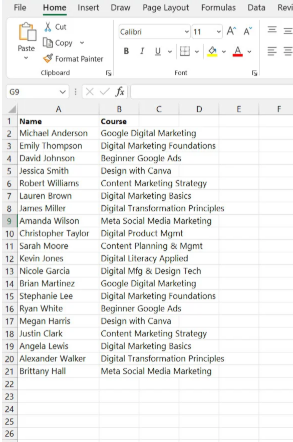
You will need to have your data organized in a spreadsheet with clear column headers. For Canva mail merge , a list of names and courses would be in two separate columns labeled ‘Name’ and ‘Course’.
First, you need to create a CSV file containing your information. This file should contain the data you want to include in different designs, such as name, email, number, or any other information.
Open thCanva mail merge emplate you want to use for your design.

In this case, it might be a ‘Certificate of Achievement’ template with textcields where you want to insert the name and course detail
Open the “Bulk Create” app in Canva and upload yourCanva mail How To Do Canva Mail Merge . Once the file is uploaded, all the data fields in it will appear in Canva.
Step 3: Map the data fields to the Canva Mail Merge designs
Now you need to map each data field to the corresponding How To Do Canva Mail Merge Canva mail merge in your design template. For example, if you have a “Name” field in the CSV file, map it to the name box in the template.
Step 4: Generate Designs
OnceCanva mail merge all the fields are correctly mapped, click the ‘Generate Designs’ button. Canva will automatically generate a separate and personalized design for each entry.
Upload Data via CSV File
If you choose to upload data:
Click on ‘Upload data’.
Select your CSV file, and it will be uploaded to Canva.
Manually Enter Data
If youHow To Do Canva Mail Merge to enter data manually:
1. Click on ‘Enter data manually’.
2. Clear the existing table.
So, for example, where there is a ‘Name’ in the design, you want to add the name from your data. If 20 names are uploaded, you will get 20 design pages on Canva.

Pro Tip:Canva Mail Merge
Canva’s Bulk Create feature is only available to Canva Pro or Canva Teams users.
Whichever way you choose to upload your data, the end result will be the same.
If you don’t have a Canva Pro account, you won’t be able to access this feature.
No matter how you upload your data, the end result is that your data will be added to Canva.
In this example, I simply uploaded a CSV file with two columns: Name and Courses. So these are the two fields that are visible here in Canva
Conclusion How To Do Canva Mail Merge
Mastering Canva Mail Merge allows you to efficiently create personalized designs at scale—saving time while maintaining a professional and customized touch. Whether you’re generating certificates, business cards, invitations, or marketing materials, Canva’s bulk creation feature streamlines the entire process. By connecting your design template with a CSV data file, you can automatically insert unique names, emails, or details into each design with just a few clicks. This powerful tool is ideal for marketers, educators, and businesses aiming to deliver tailored content quickly and effectively. In short, Canva Mail Merge transforms repetitive design work into a fast, automated, and creative workflow
https://www.canva.com/help/bulk-create/
https://regilia.com/how-to-flip-and-rotate-elements-in-canva/